We were originally called out to this property to inspect concerns with the siding installation. During that inspection, we also began noticing problems with the roof. The roof had been replaced as part of the same overall project, and as we looked closer, we found a number of issues that raised concern about the quality of the installation and about what may be hidden beneath the finished surface.
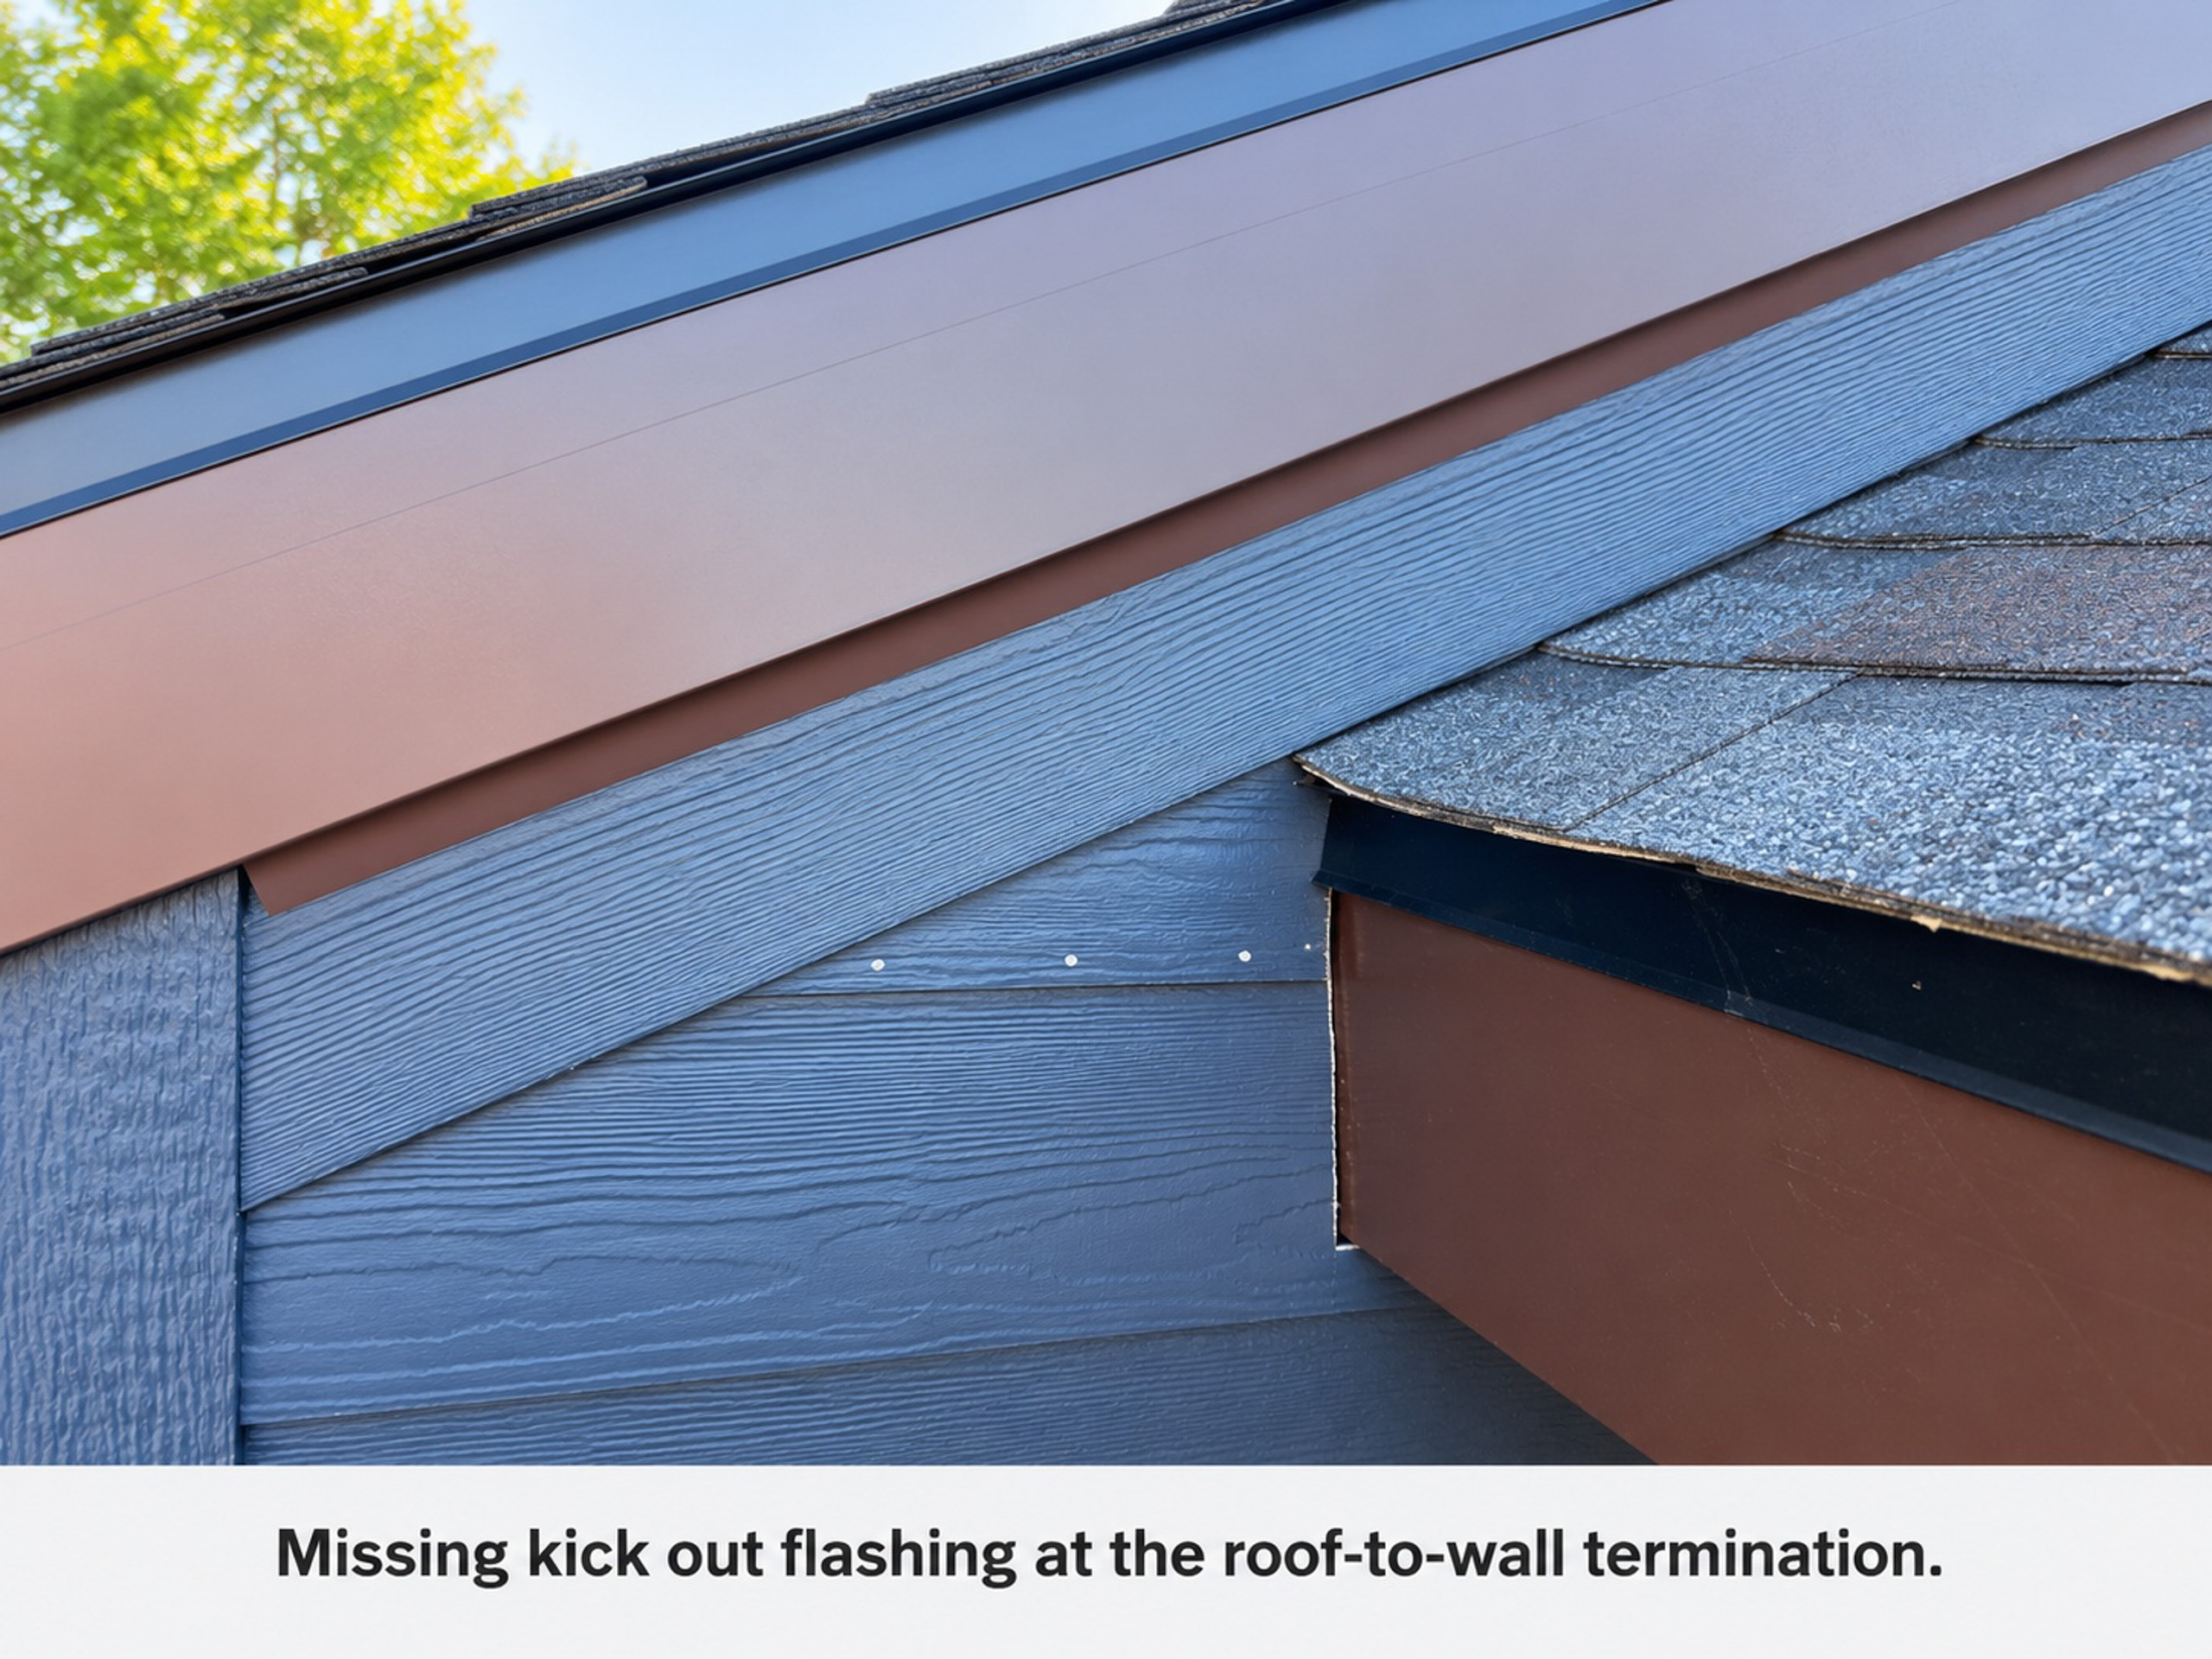
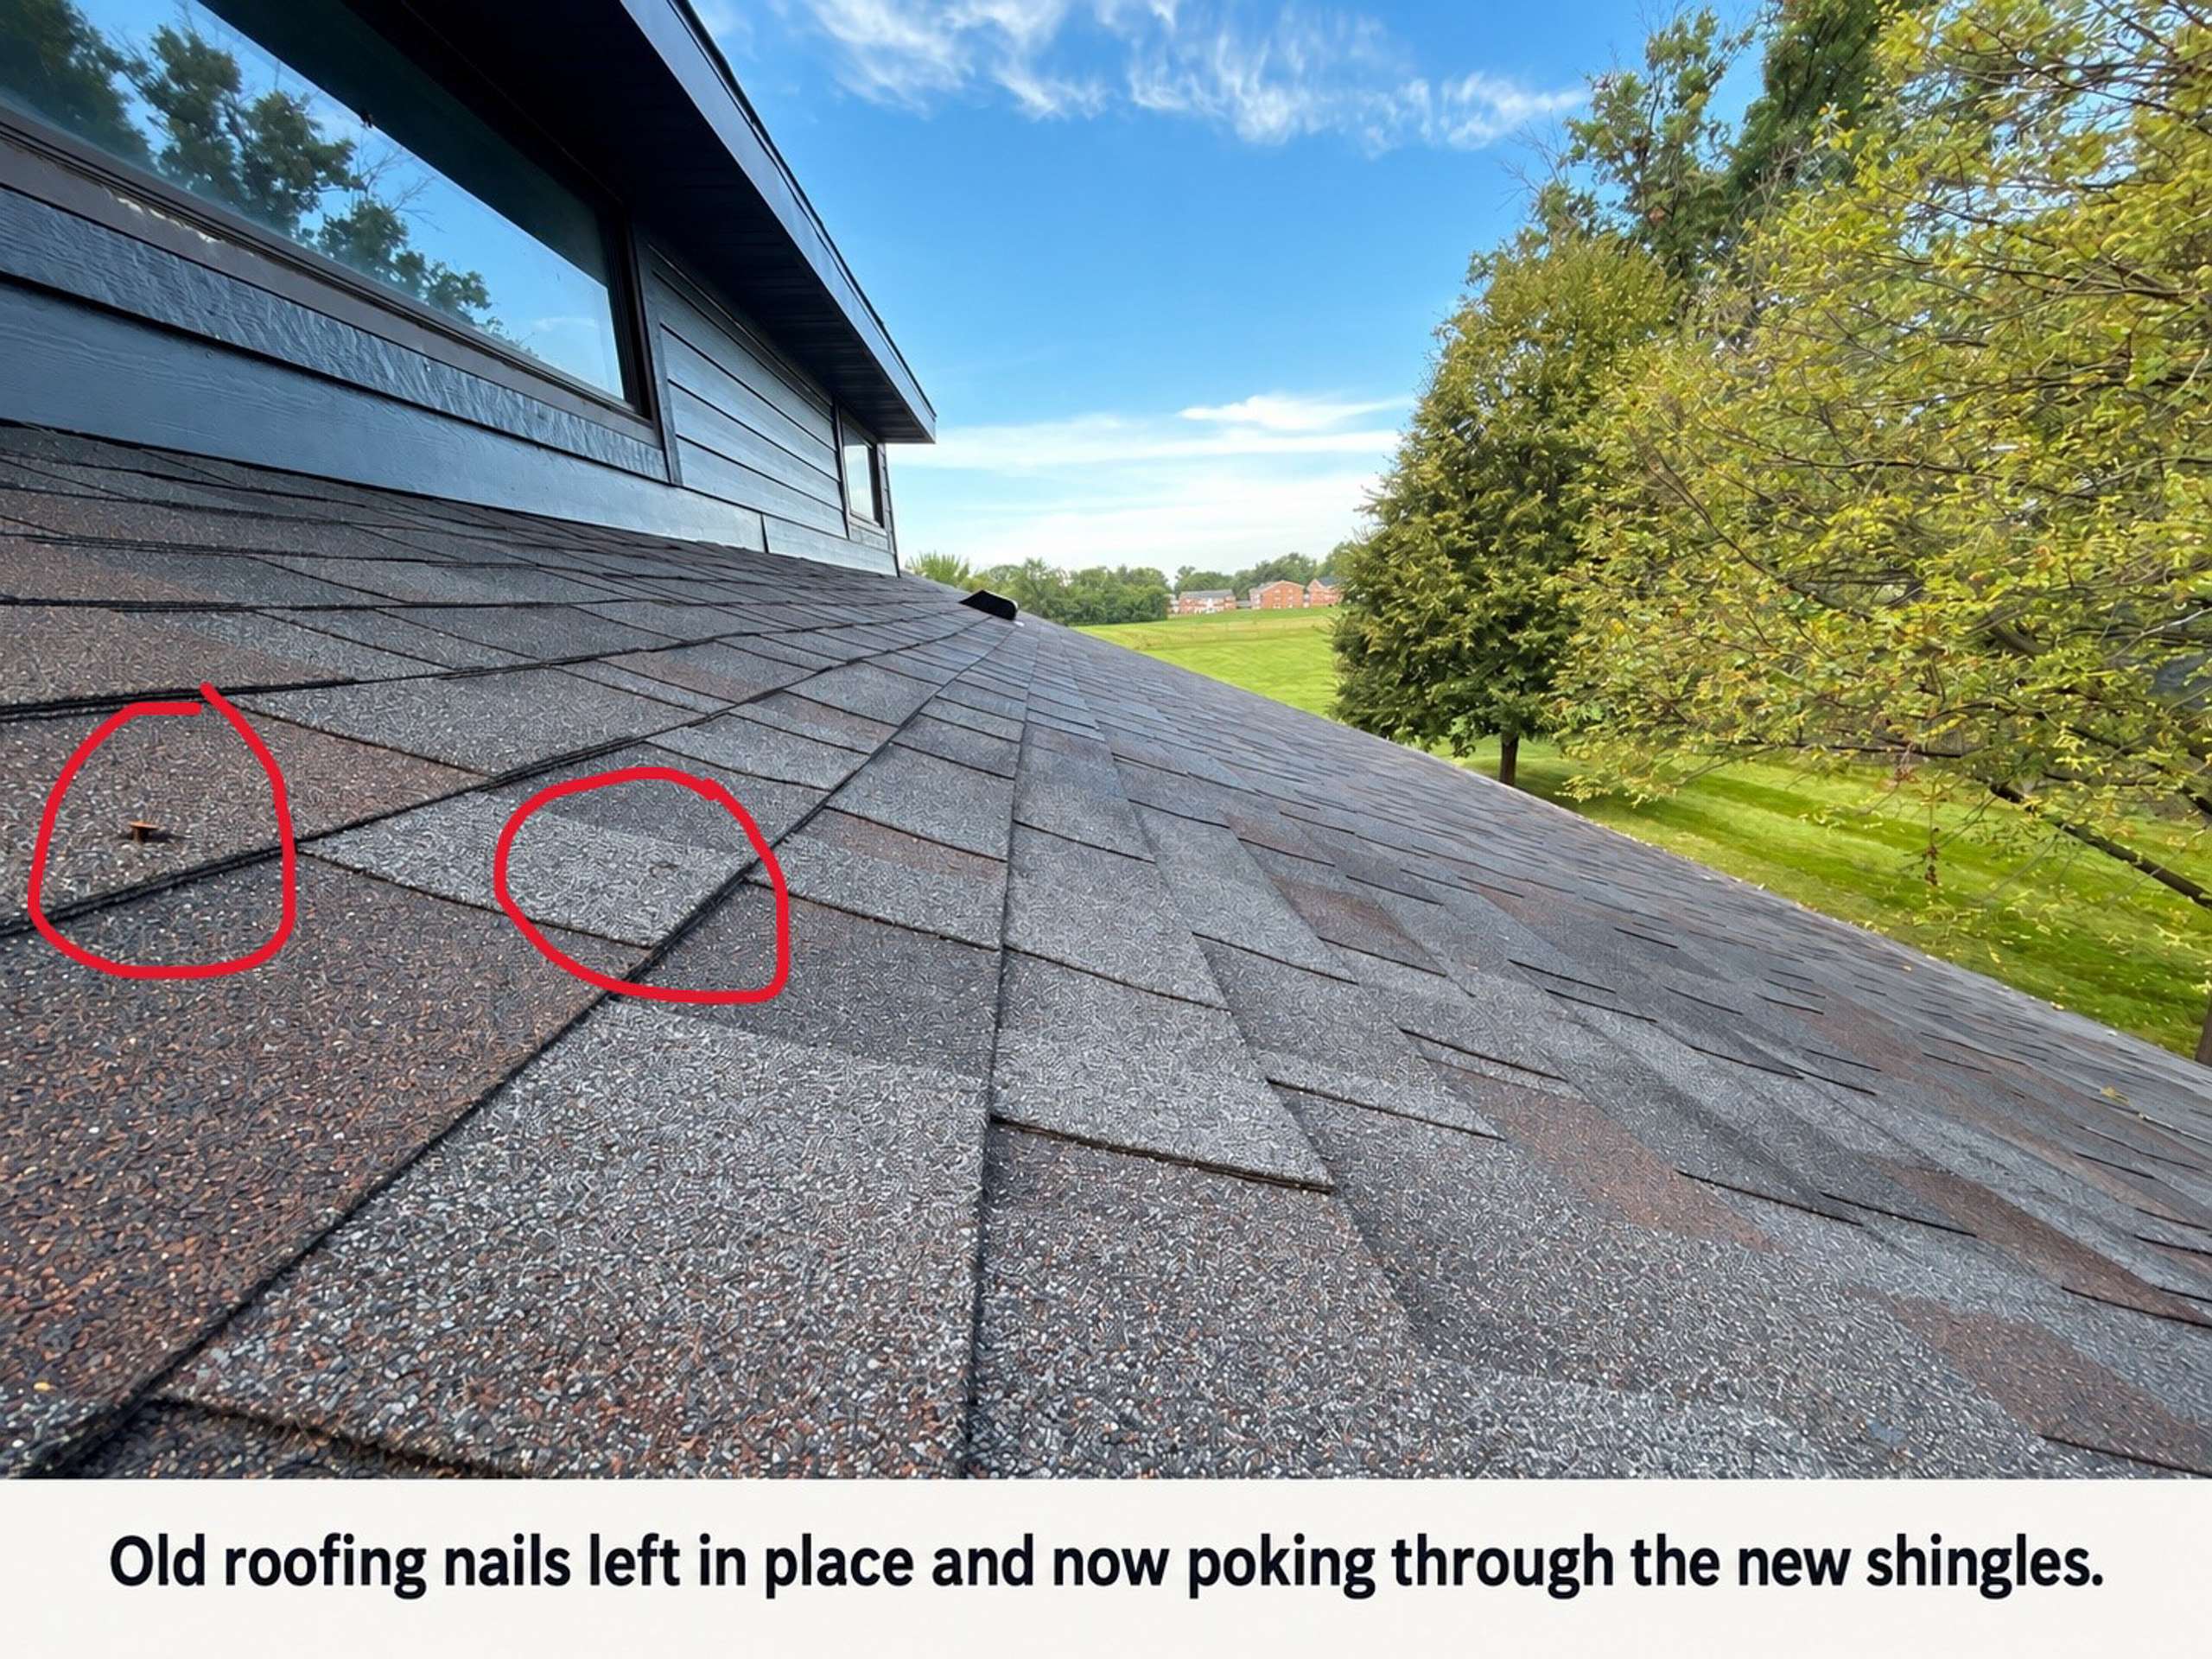
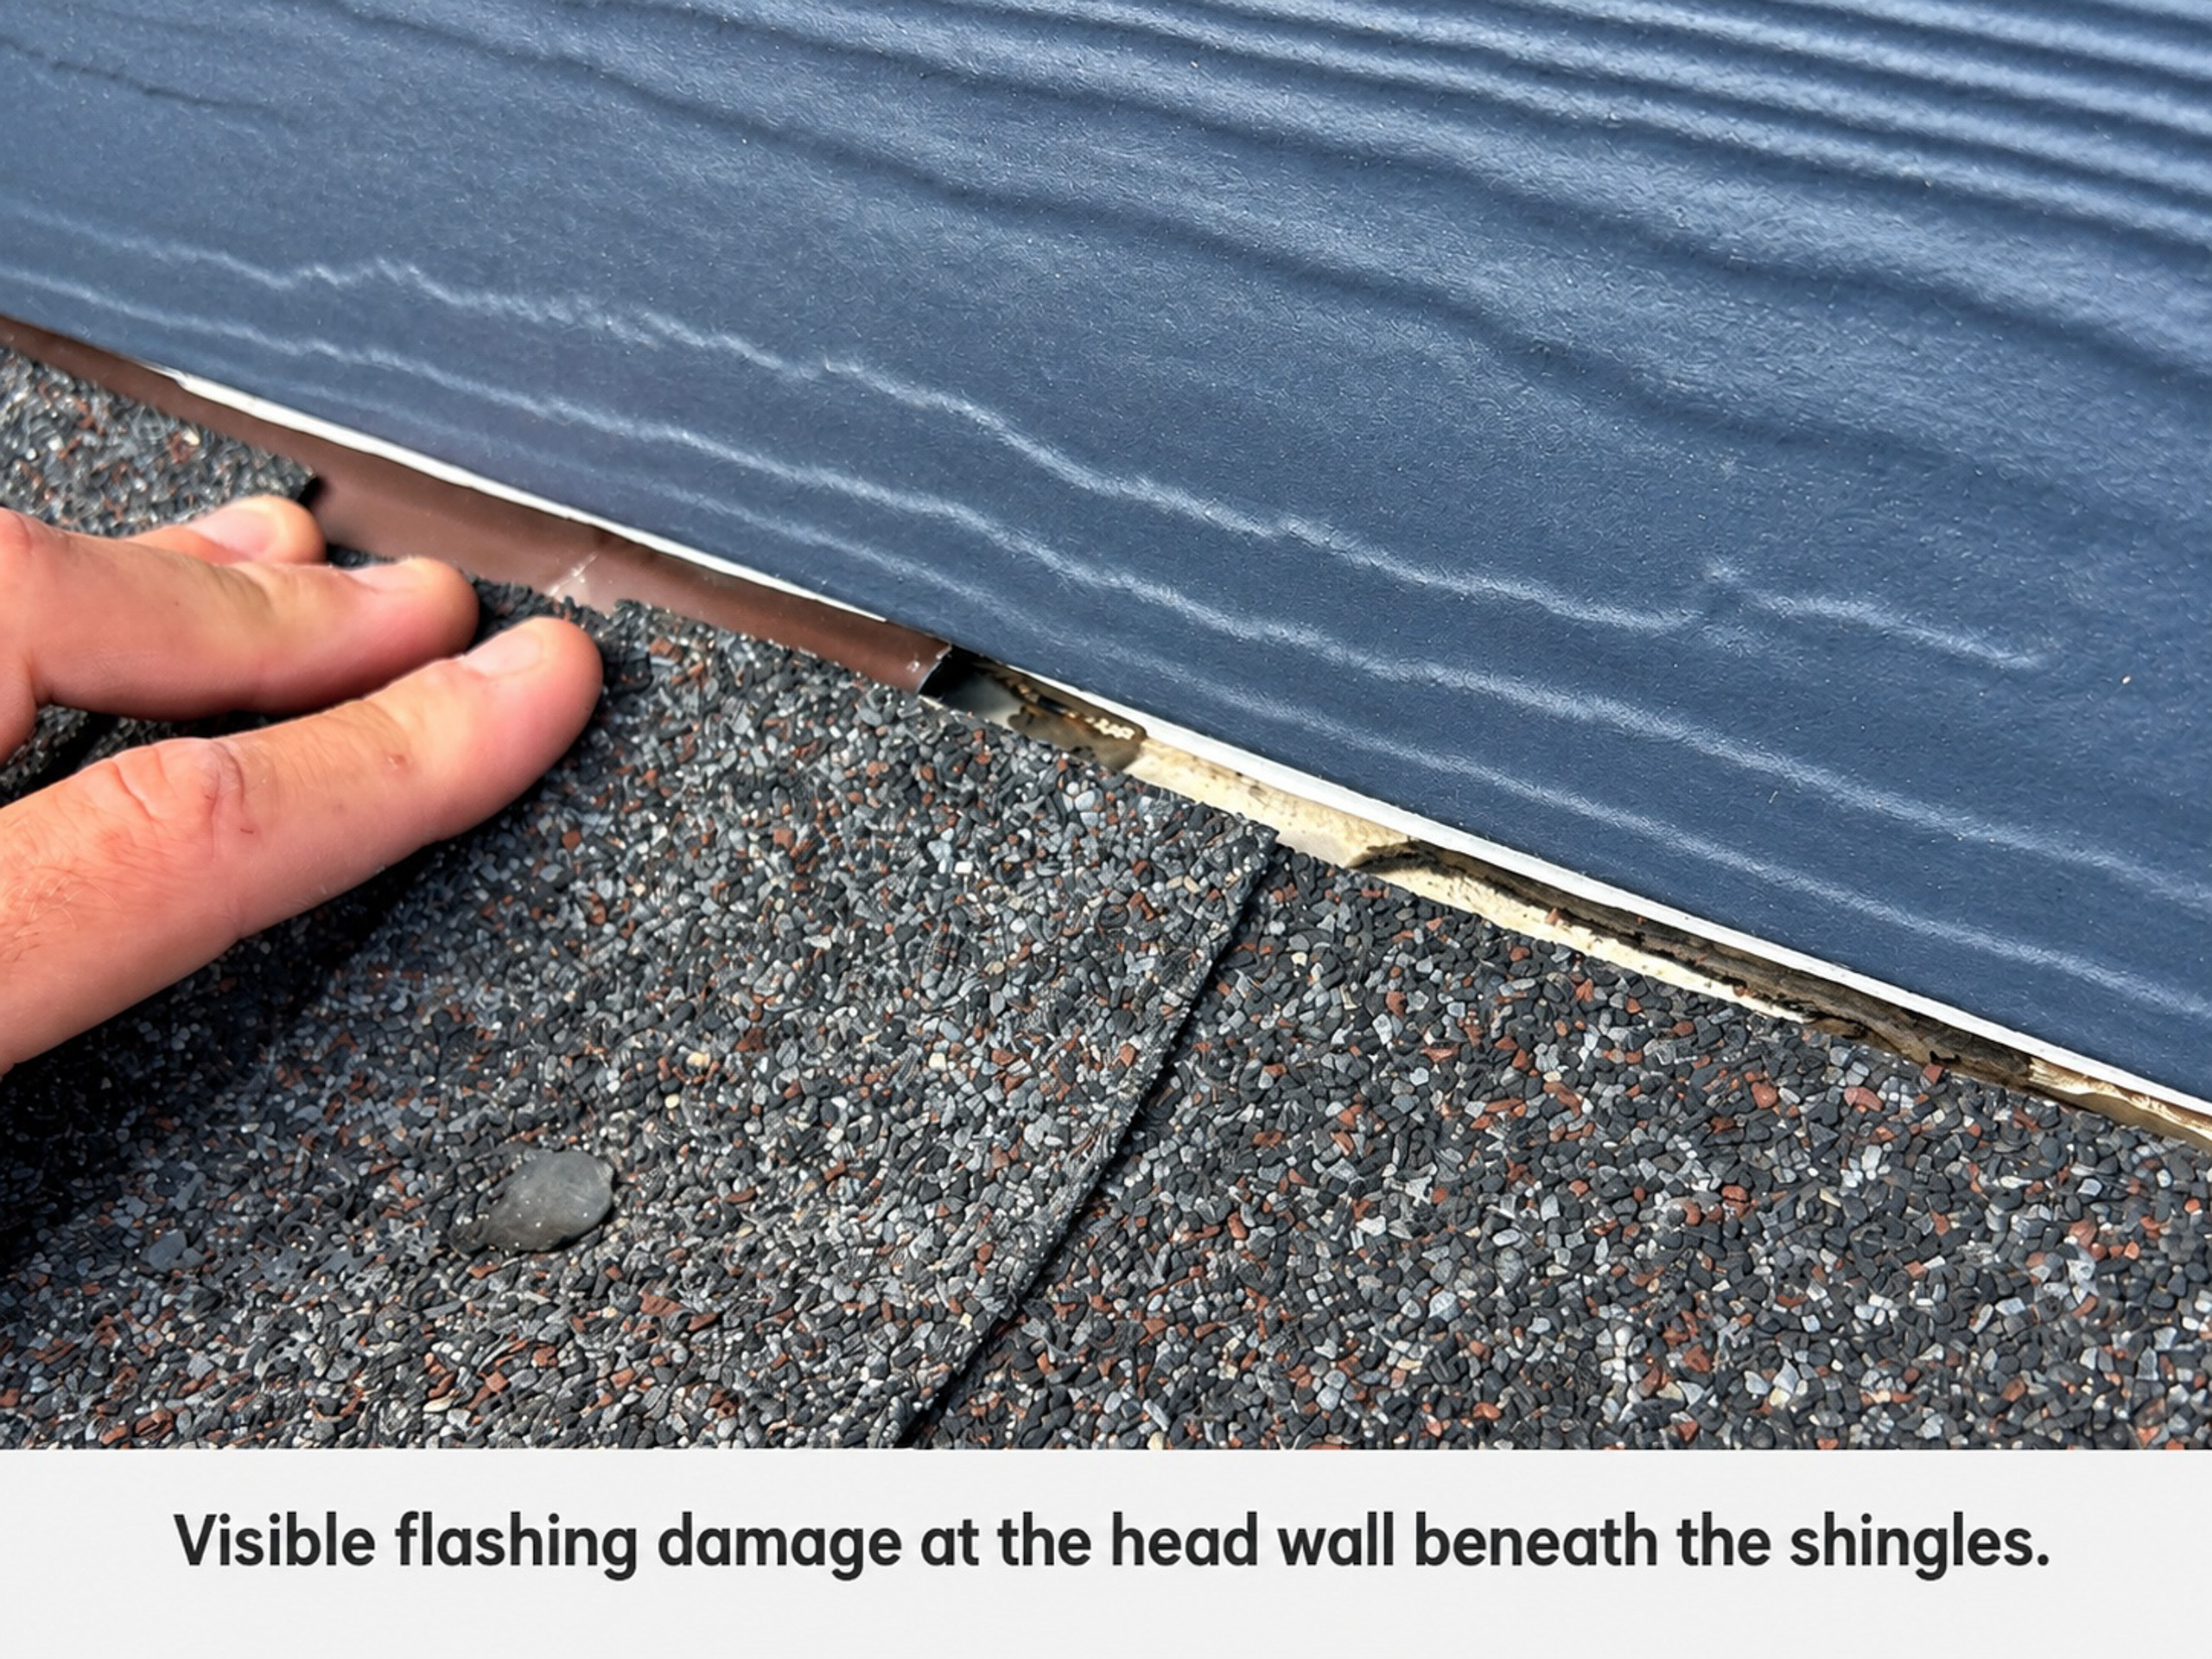
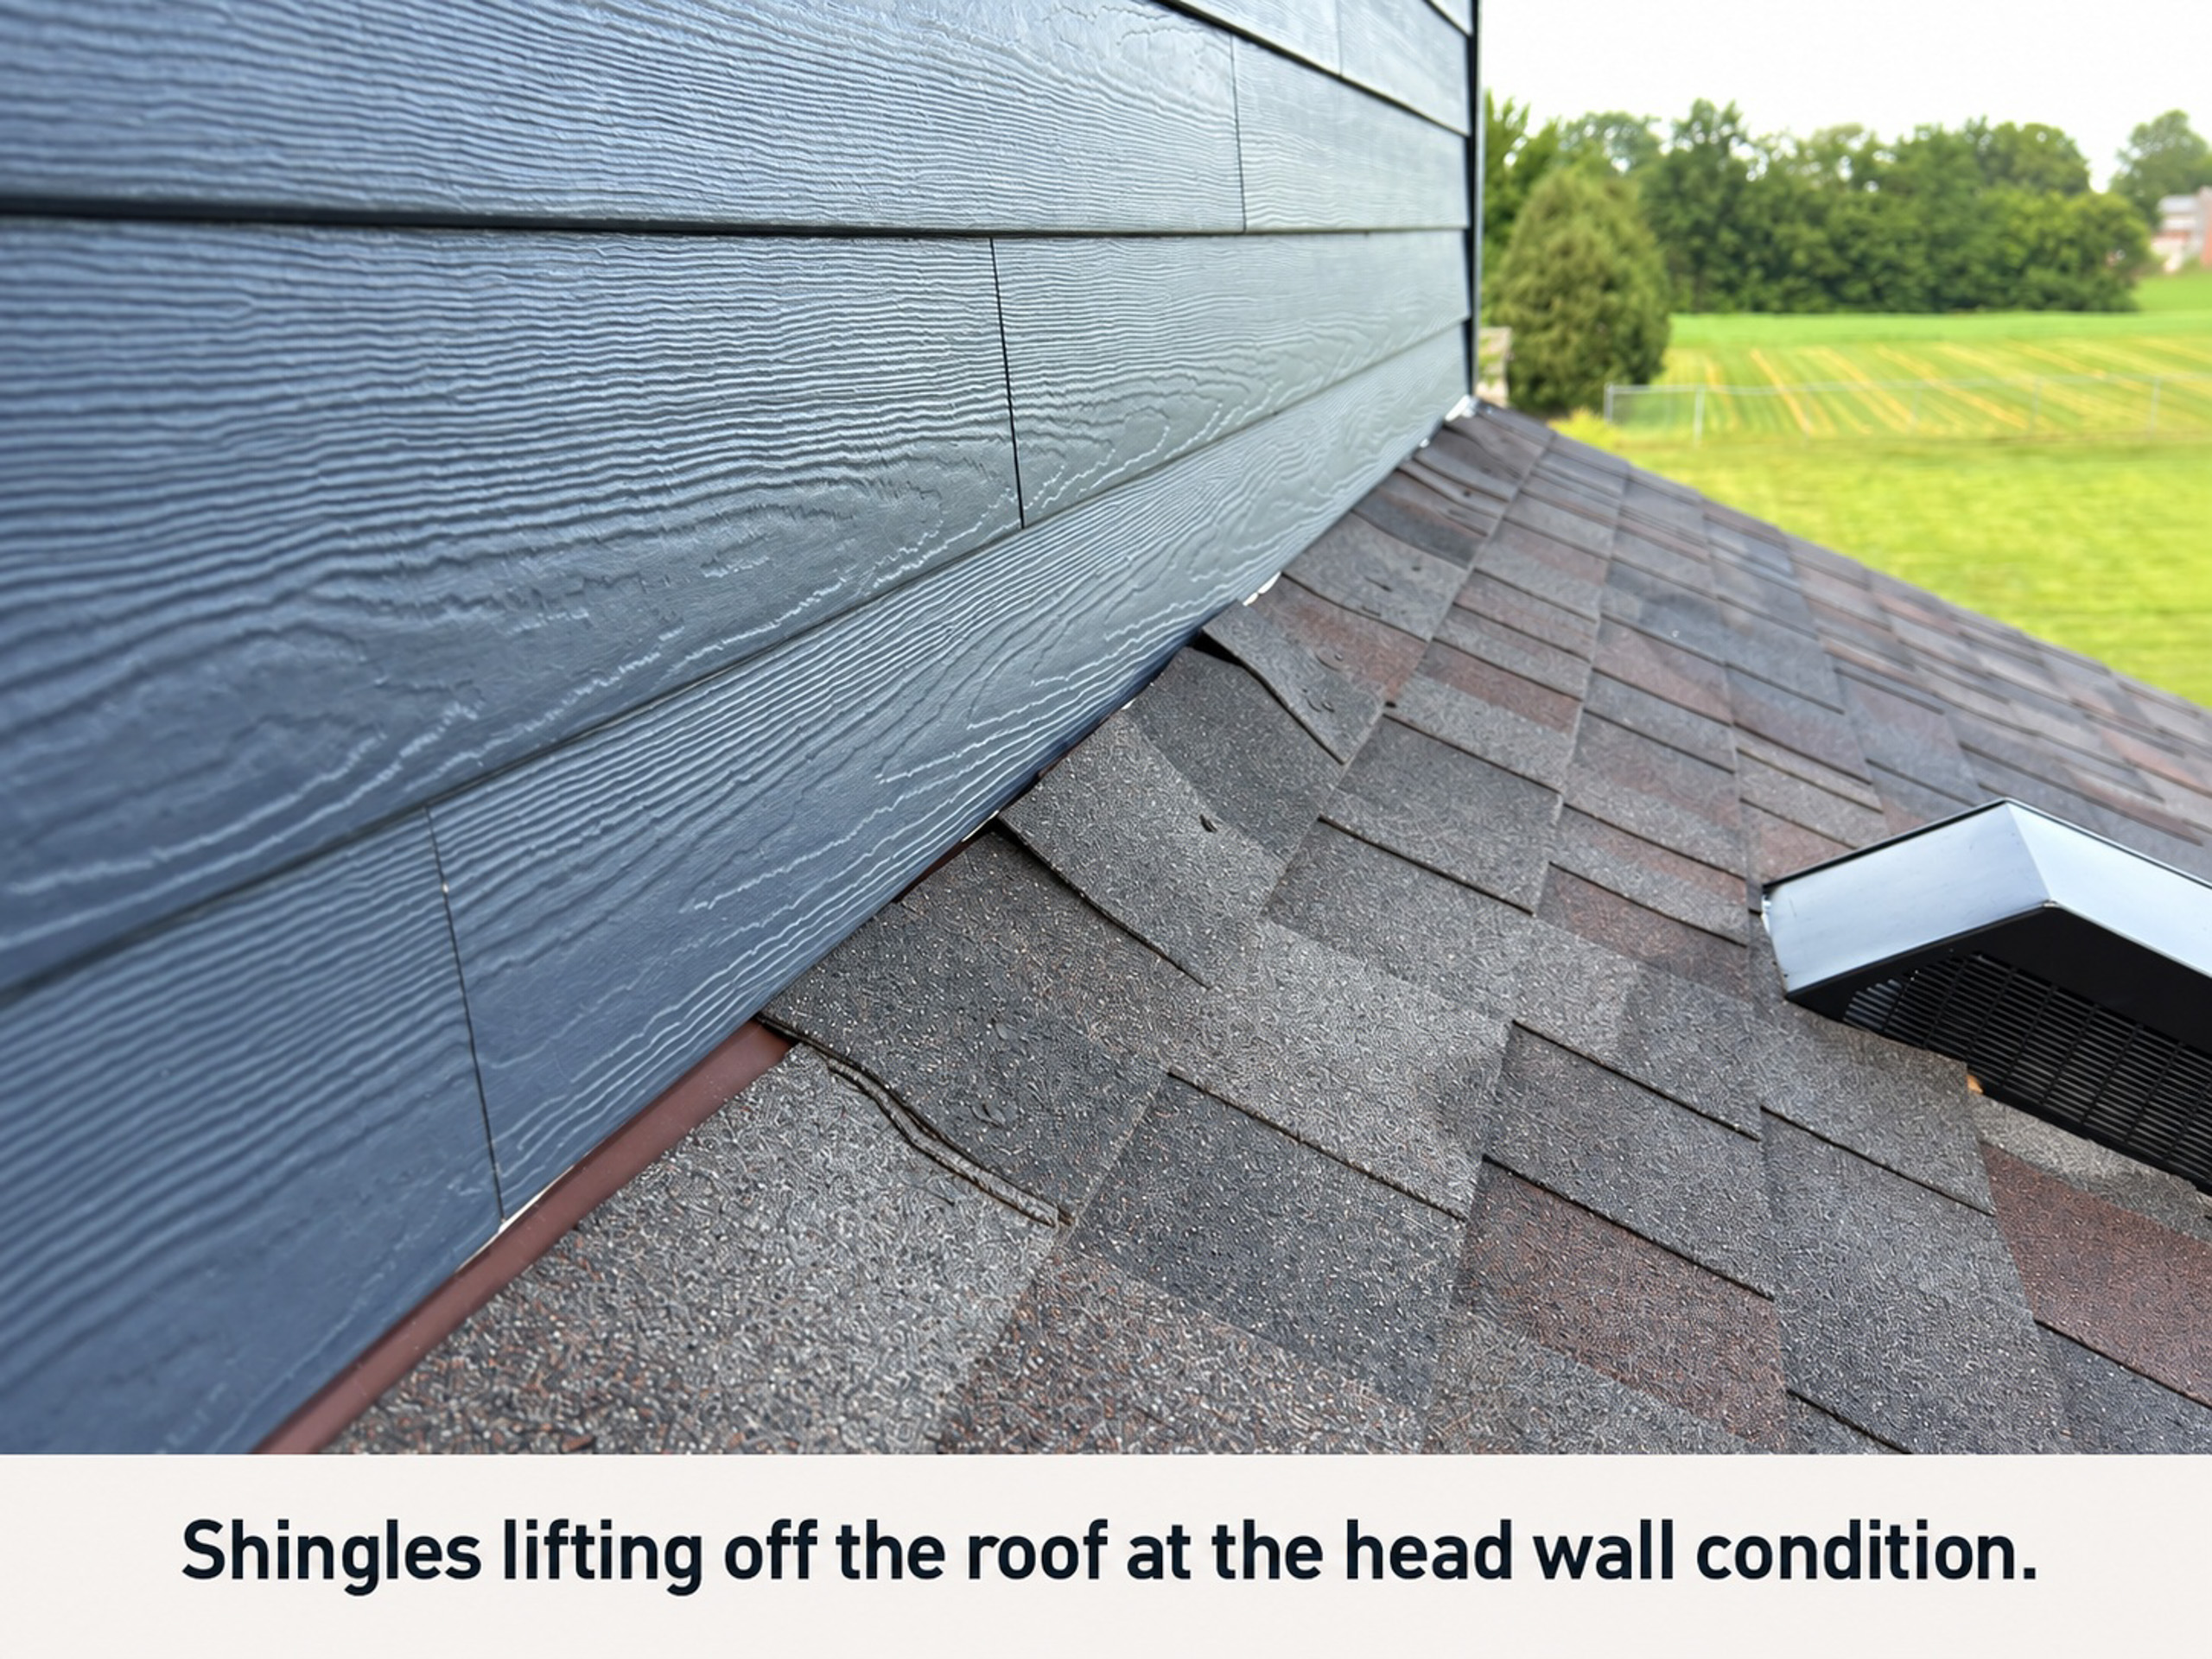
Some of the deficiencies were visible right away. We found exposed nails, torn shingles, missing kick out flashing, and areas where the roof-to-wall details did not appear to be properly executed. In one area, old roofing nails had not been removed before the new roof was installed, and the heads of those nails were now poking up through the new shingles. In another location, shingles were lifting at the head wall. We also observed visible flashing damage beneath the shingles at a head wall, and in some areas it appeared that portions of the old shingles and old flashing had been left in place against the house instead of being fully removed and replaced.
That kind of thing should immediately raise a bigger question. If obvious deficiencies like these are visible on the finished roof, what is going on in the areas you cannot see? Were the concealed flashings installed properly? Was the underlayment lapped correctly? Were the shingles fastened properly? Was the correct starter used? Were the edge details installed in the proper sequence? Once the roof is complete, most of the important waterproofing details are buried and cannot be confirmed without selective removal.
A lot of people think roofing is simple. Tear off the old roof, put down felt or synthetic underlayment, install flashings, and nail on shingles. But that is not really how it works. Every shingle manufacturer has specific installation requirements, and those requirements matter. There are different product levels, different impact ratings, different accessory requirements, and different fastening requirements depending on the product and warranty. If a higher wind warranty was part of what was sold, that can require a different nailing pattern and specific starter and accessory requirements. If those requirements are not met, the warranty the owner thought they were getting may not actually be in place.
That is one of the biggest issues we see in the field. Owners assume that because a roof is new, it must have been installed correctly and must qualify for the product and warranty they paid for. But who is verifying that? Is anyone checking the nailing pattern? Is anyone verifying the correct starter shingles were installed where required? Is anyone confirming that underlayments were installed with the fasteners allowed by that manufacturer? These details matter, especially when there is later a claim, because manufacturers can deny warranty claims when their installation instructions were not followed.
Flashings are another area where a lot of problems show up. Some of the most common mistakes we see are at roof edges, head walls, sidewalls, and roof-to-wall transitions. The order of installation matters. The materials need to be layered so water sheds correctly, and that means the relationship between edge metal, underlayments, membranes, shingles, and wall flashings cannot just be guessed at in the field. Missing kick out flashing is another example. It may look like a small omission, but that one piece is intended to direct water away from the wall and into the gutter system. When it is missing, water can continue running into the wall assembly and contribute to moisture damage over time.
Another important point on roof replacement projects is the scope of work itself. It needs to be clearly established up front whether all flashings are to be removed and replaced as part of the roofing work, or whether certain existing flashings are intended to remain in place. That should not be left vague. If flashings are being replaced, that decision can affect adjacent finishes such as siding, trim, wall coverings, and other exterior facade materials. In many cases, proper flashing replacement may require disturbing or removing portions of those adjacent finishes in order to do the work correctly. If that impact is not discussed and accounted for in the scope, it can lead to shortcuts in the field, partial replacement, or attempts to work around existing conditions in ways that compromise the final installation.
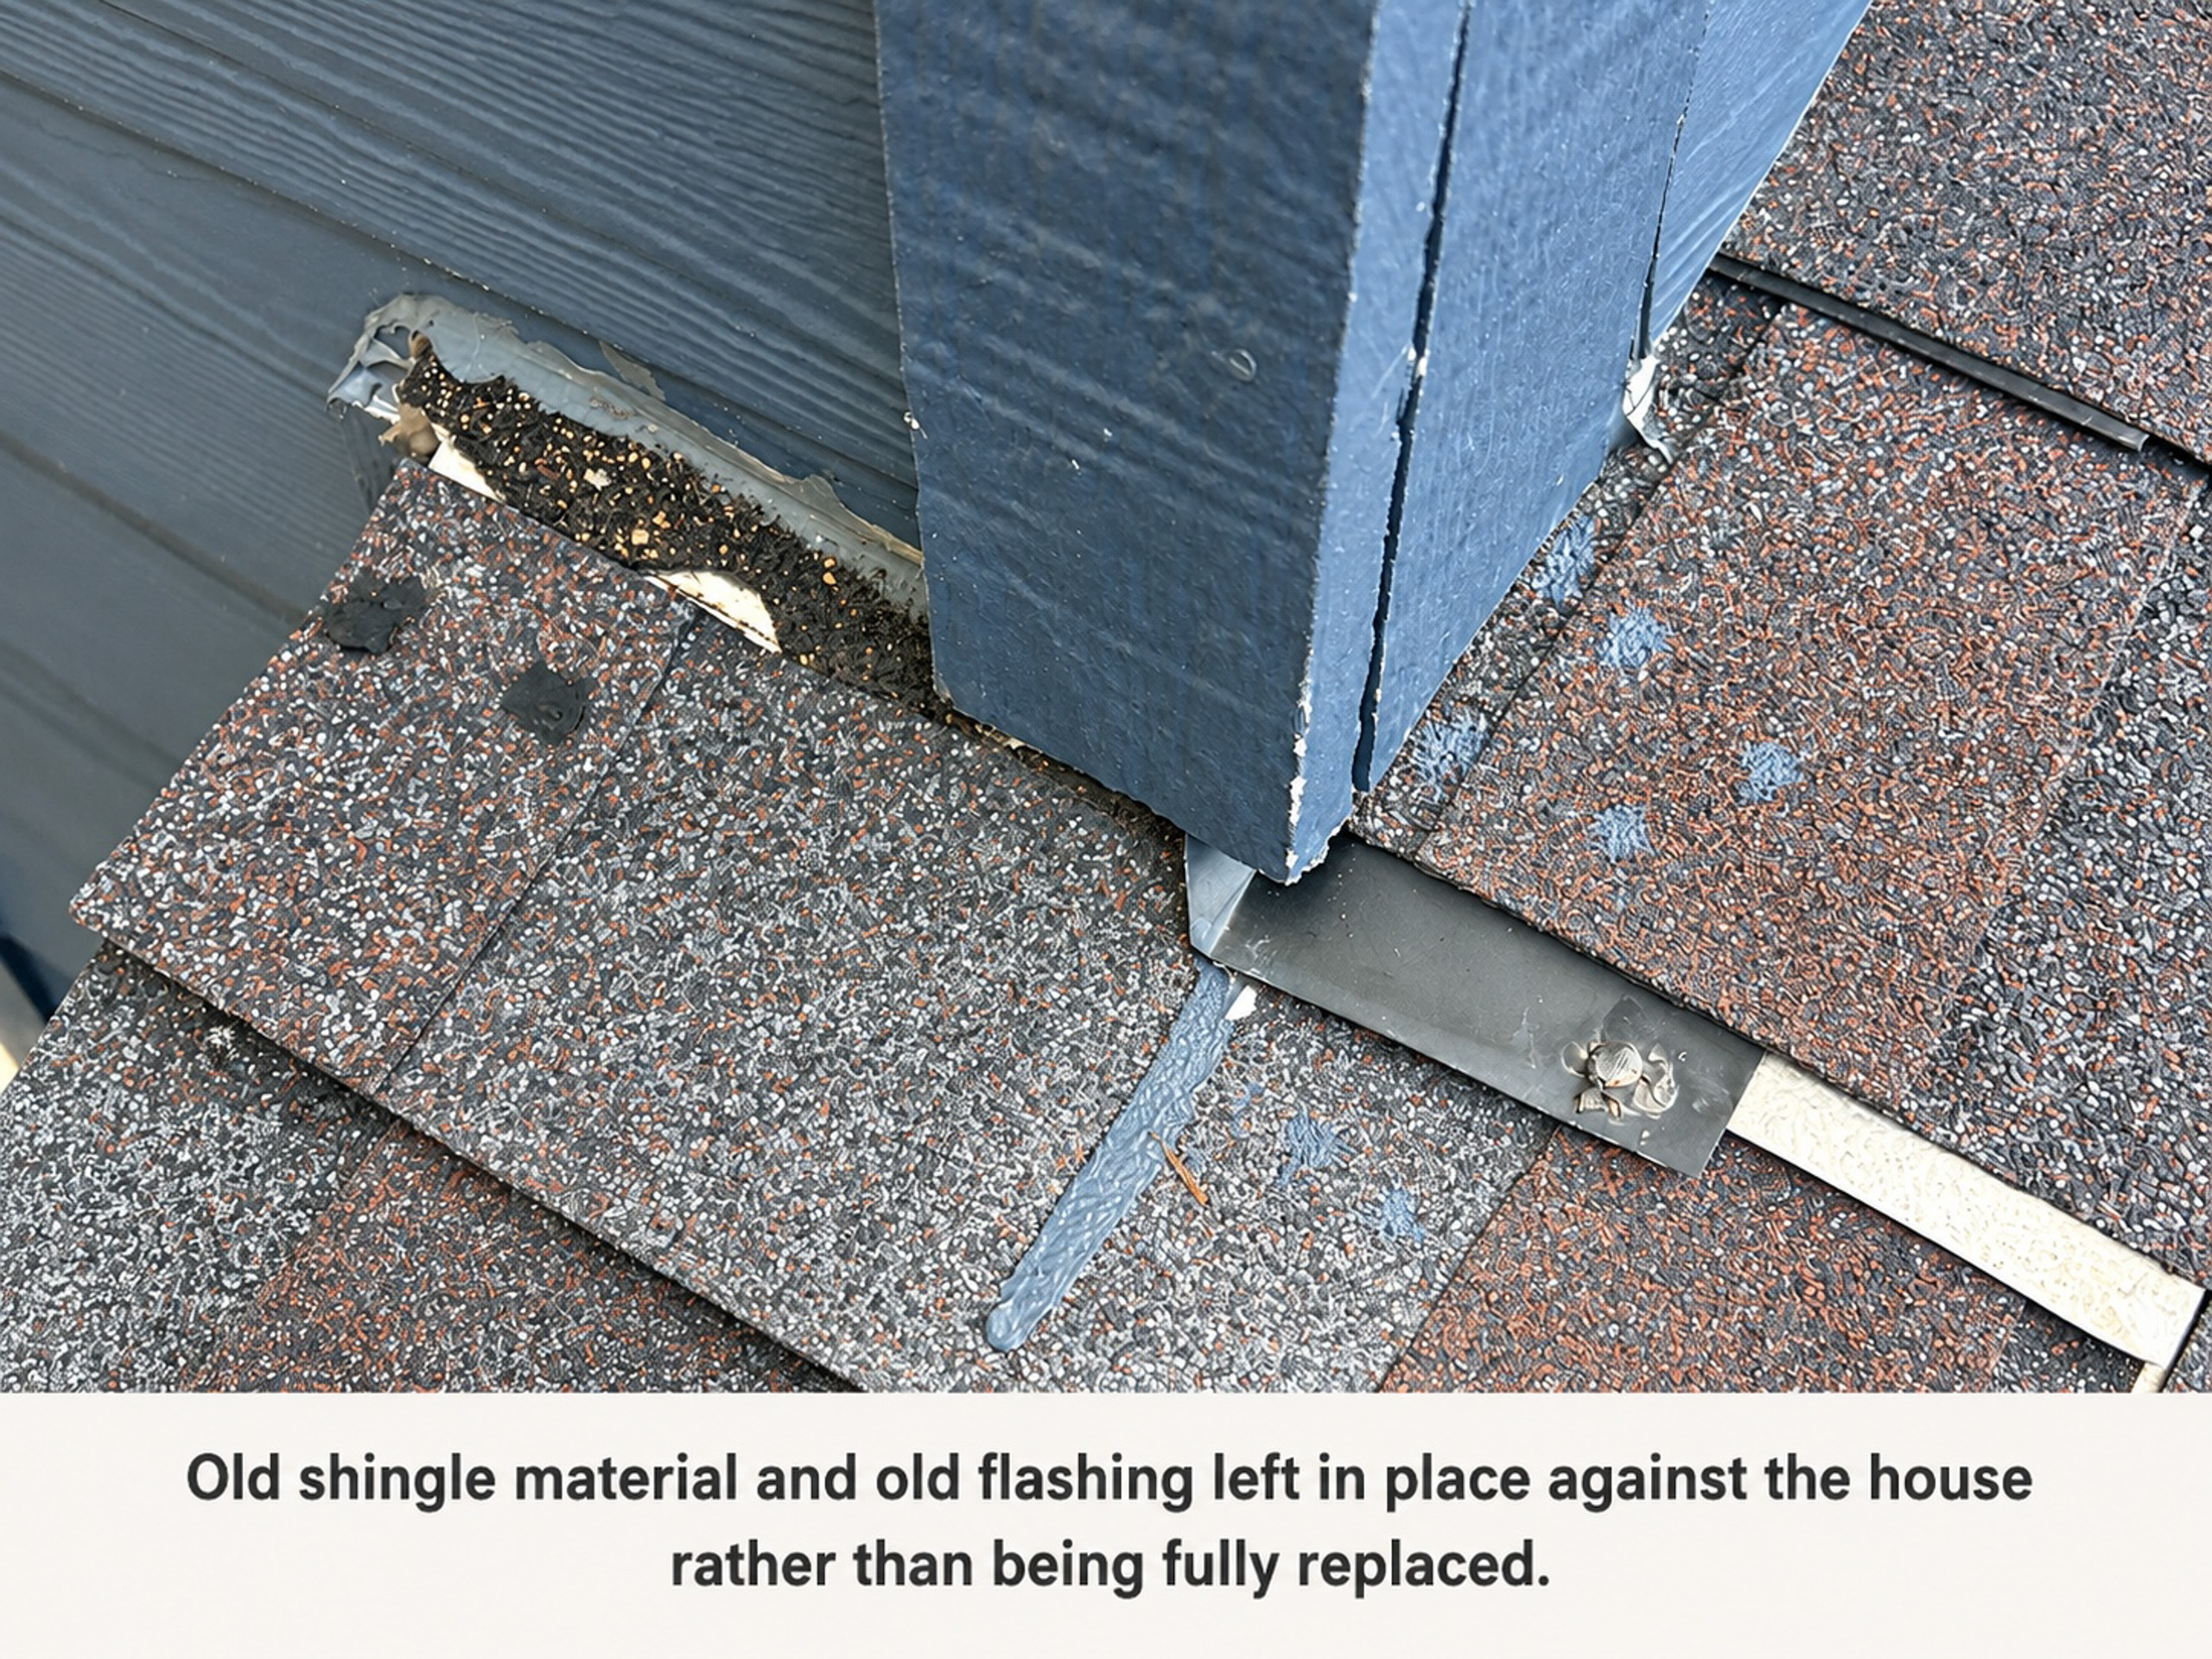
That appears to be part of the concern here. In a few of the areas we reviewed, it looked like old materials had been left in place rather than being fully removed and properly tied back into the wall assembly. When that happens, the question is no longer just whether the shingles look neat from the ground. The real question is whether the roof system was properly integrated with the surrounding construction in a way that will actually perform.
This roof is a good example of why roof replacements should not be treated as simple tear-off-and-replace work. Roofing is not complicated because shingles are hard to install. It is complicated because all of the small details, underlayments, flashings, transitions, fastening, clearances, and sequencing, have to work together. When basic issues like old nails poking through new shingles or missing kick out flashing are visible at the surface, it gives very little confidence that the hidden parts of the roof were handled correctly either.

Have questions about a construction project or concerns about work that has already been completed? Our team can help you understand what’s happening and determine the right next steps.


.svg)
.svg)